2018-10-10
How to print Amazon FBA Labels to a 4x6 inch format on a Zebra thermal printer.
FBA Labels, Editorial Team 4x6, Thermal Printer, Zebra, PDF labels, Shipping Labels,
This post presents a step-by-step guide to printing your Amazon FBA shipping labels to a 4x6 inch format on a Zebra thermal printer.
Amazon provides two types of shipping methods for which you can download labels from its FBA shipping portal. One type is the Small Parcel Delivery or SPD shipping method. The other type is the Less Than Truckload or LTL shipping method. After you have completed the selection of the shipping method you require and downloaded the postage file, what you get is a PDF containing LETTER (8 1/2 x 11 inch ) sized pages to be printed on your desktop printer.
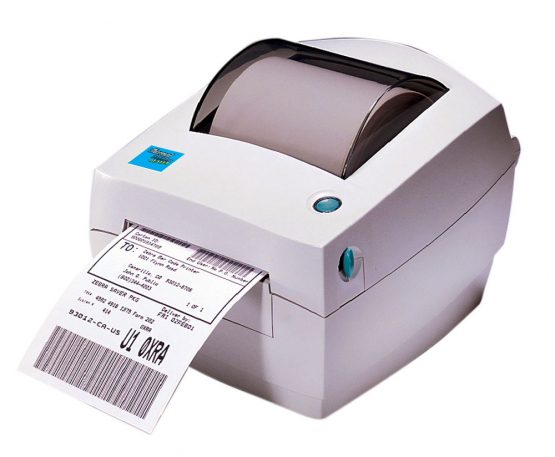
Many merchants prefer to print these labels instead to their Zebra thermal printer using 4x6 inch labels. Since Amazon's shipping portal does not directly provide a 4x6 inch format, you will need to use a label conversion tool, such as Label2Label, to convert and transform the labels you download into a new file containing 4x6 inch sized pages that can be printed directly to the Zebra thermal printer.
The process is very simple, as I will explain in the following sections. We will start off by converting an SPD shipping label.
Printing Small Parcel Delivery labels to 4x6 format
The Label2Label dashboard is where you will perform your label conversions. It guides you through four simple steps to perform the conversion. Let's walk through each of these in detail.
STEP 1
![]()
Step 1 is where you select the label format of the file you will upload. This is not the same as the file format since the file format will always be of type PDF. However those PDF documents will define pages of a specific size and on those pages will be postage or shipping labels in specific locations. Some contain one label per page and some contain multiple labels per page. This label format refers to the page size and layout of the shipping or postage label contained in the document.
Click the dropdown select control, labeled "Select upload format here". A list of available label types will appear. Select the type that matches the label file you will upload. This is the same file you downloaded from FBA shipping portal. Since we are starting off converting a Small Parcel Delivery file first, we will look for the label type named “Amazon FBA Small parcel delivery SPD UPS”.

You can also type in any subset of the name to filter the list of available options, making the label type you are looking for easier to find. For example, if we type in "UPS", only the labels that have UPS in their description will be listed in the list. If we type "SPD", only the labels that have SPD in their description will be listed, and so on. Once we have located and selected the label type, it will automatically proceed to step 2. If you selected the wrong label type here, simply hit the blue "Reset" button and start the sequence again.
STEP 2
Step 2 is where you will upload your PDF label file. We will go ahead and drag our FBA label from the desktop or downloads folder, to the step 2 area. Alternatively, you can use the ‘Select Files’ button to add a file from anywhere on your computer.

An icon of your file along with its name will appear in the step 2 area, indicating that it is ready to upload. If you have accidentally dragged the incorrect file to the step 2 area, you can hit the ‘cancel’ button. This will clear the pending upload, and allow you to drag in another file.

When you are ready to proceed, select the button labeled “Upload and proceed to step 3”. This will upload your label file and activate step 3.
STEP 3

Step 3 is very similar to Step 1, except instead of selecting the label format you want to upload, it is where you will select the label format you want to print.. Click the dropdown select control. Again, a list of available label types will appear. Since we want to print this label to our Zebra thermal printer, we will select the "Zebra 4x6 direct thermal paper label" format.

Just like Step 1, if we wanted to search for a label by name, we could enter any subset of the name into the search box, and the list will be filtered by labels that contain that phrase as part of its name. Once you select a label format in Step 3, it will advance to Step 4 where the label conversion process will begin.

In this case it will take the label format we selected in Step 1, “Amazon FBA Small parcel delivery SPD UPS”, and extract the labels from the file we uploaded in Step 2, into a new PDF document using the format we selected in Step 3, "Zebra 4x6 direct thermal paper label". This process can take as little as 1 second for small files with one or two labels, or it can take several seconds for files with larger quantities of labels.
* It is important to pay attention to the difference between the “Amazon FBA Small parcel delivery SPD UPS” label format for UPS and the “Amazon FBA Small parcel delivery SPD FedEx” for FedEx. There are subtle layout differences between the two. If you select one format in Step 1 but uploada file of the other format, you labels may come out skewed, uncentered, or cut-off. For more information about the potential problems, see blog post: Streamline your Amazon FBA restocking process using a PDF label converter.
STEP 4

Step 4 will show rotating arrows while the conversion process is in progress. When it is complete, the first page of our converted document is displayed, along with the number of converted labels, the number of pages in the file, and the file size.
If all looks good, press the download button to download the converted file. If you have PDF files associated with your browser, it will open in a new tab. if you don't have PDF files associated with your browser you can save the file and then open it in the PDF viewer of your choice. In either case you will then be able to print the file directly to your Zebra printer.
Printing Less Than Truckload labels to 4x6 format
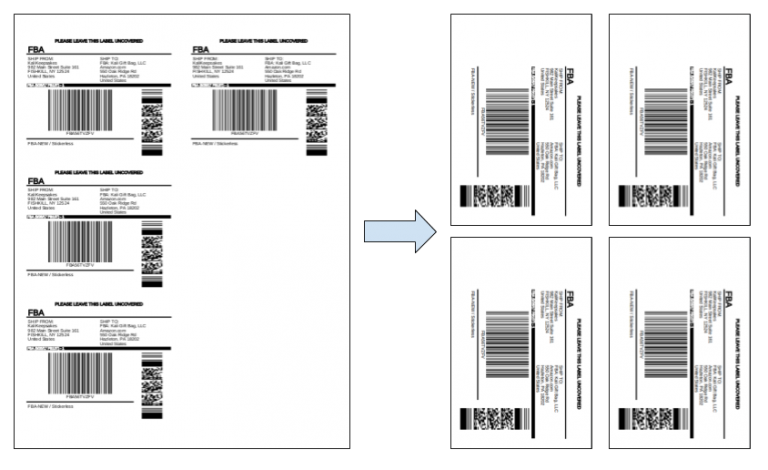
To convert Less Than Truckload labels to a 4x6 format you would follow a similar set of steps. The one difference is on Step 1. In this case you would select the label format named "Amazon FBA Less then truckload LTL", which is a six label per page format. The conversion process will extract the labels in the LTL label format into individual labels on a 4x6 page as shown below.
The Label2Label Dashboard
Before we wrap this up, it is worth paying a little attention to the dashboard page.
Each time you log into your Label2Label account, you will be presented with the Dashboard page. The top of the dashboard page shows an area indicating the type of plan you have, and information on conversion credits. Label2Label works with conversion credits. The plan you have will determine the number of conversion credits available to you each billing cycle. Conversion credits are counted separately for address or SKU labels, which are the smaller of the two types, and shipping labels, which are larger. The dashboard will display the number of credits allotted to the plan for each billing cycle, the number of credits used, the number of credits remaining, and the total number of credits used for the account. The remaining credits are used when you perform a label conversion, and only when the file is actually downloaded in Step 4. If you never hit the download button, you credits will remain unchanged.

Often label files contain many pages with several labels per page. When converting your labels, pay attention to the remaining credits for the type of labels you are converting. Verify that you have enough remaining credits to convert all of the labels in the label file you will upload.
Conclusion
That pretty much covers it. Converting your labels is a simple 4 step process. The important part is knowing the label type you will upload and selecting the corresponding label format in Step 1.